Sonoff Firmware Update – Lava-lamp Switch

I have a lava-lamp, which should not be on for more than 5 or 6 hours at a time. So I decided to move it from switching on/off manually to something a bit more automated. For this I reprogrammed a Sonoff WiFi switch (based on the ESP8266). Now it can be controlled via voice commands (via Alexa / Amazon’s Echo Dot), and via some simple CURL (Wifi) command line call’s. The curl’s are put in a cron (timer) process on my linux server, and turn the lamp on and off at certain times. The Alexa voice override is added for occasions when you want to deviate from the scheduled times.
The plan is to add a little software service, which monitors the duration the lamp is on, and if it reaches 5 hours, it should automatically switch the lamp off again. When leaving a lava-lamp on for too long, it’s fluid might become cloudy.
The (very nice!) firmware I used came from this project: https://github.com/arendst/Sonoff-Tasmota, and can be flashed using a USB to serial converter, and soldering in some program header pins in the Sonoff.
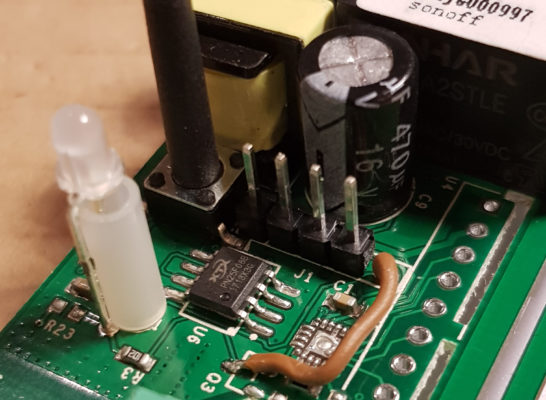
In addition to soldering in the programming header pins, I also added a piece of wire to connect the unused red color from the two color led in the device. The Sonoff comes with a dual color led, because another version of the device (using the same printed circuit board, which has 433Mhz remote in addition to WiFi) uses the second color also.
Here’s the photo’s of my altered Sonoff:
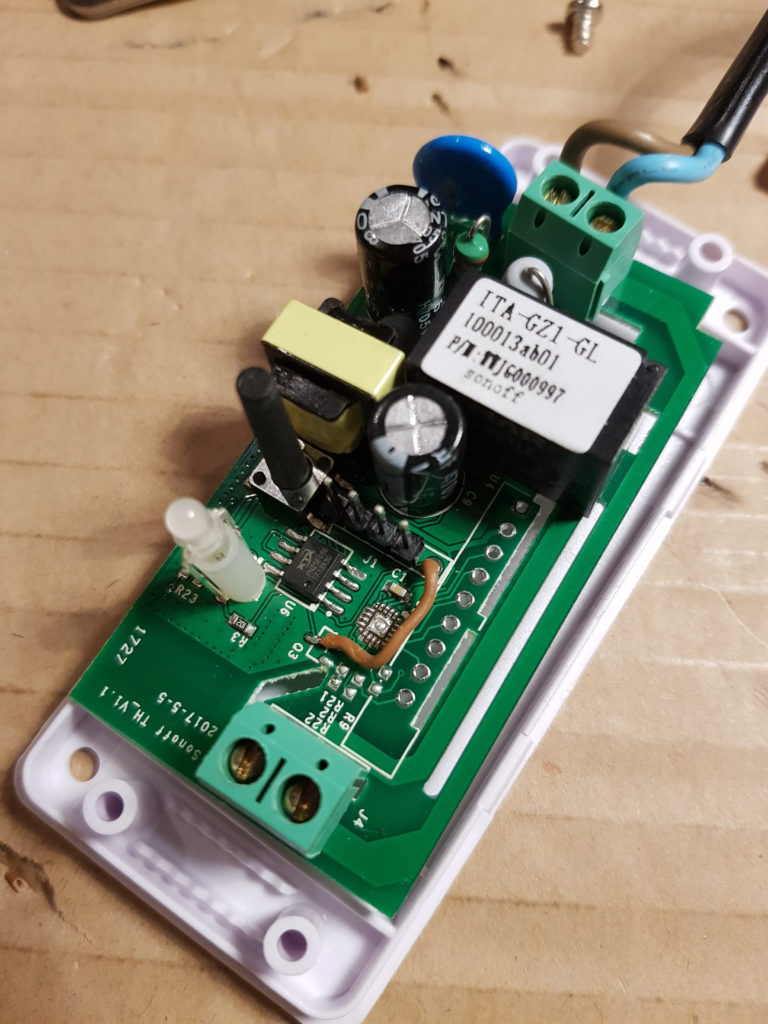
Top View – 4 programming pins, and a small wire for the red Le 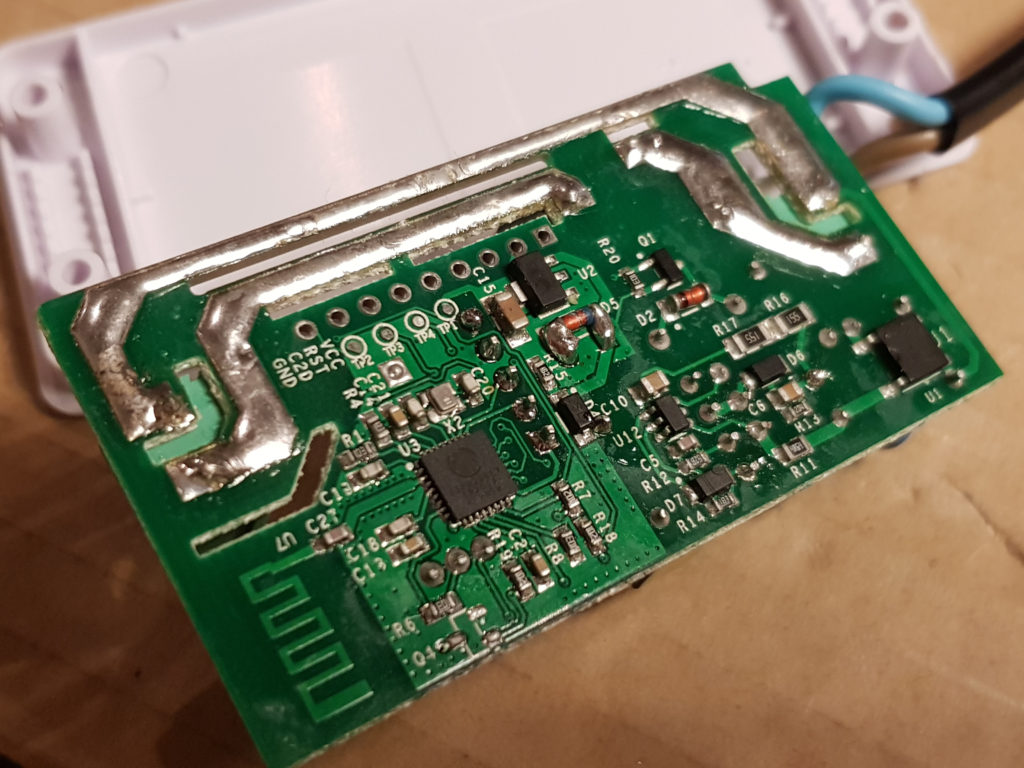
Bottom view
To program the device, I did use a USB to serial converter connected to the programming pins:
WARNING: DO NOT CONNECT MAINS POWER AT THE SAME TIME AS THE PROGRAMMER! Even better; do NOT connect mains power when the Sonoff is unboxed… The circuit has NO separation from the mains power lines! Deadly for human’s and for programmer/computer.
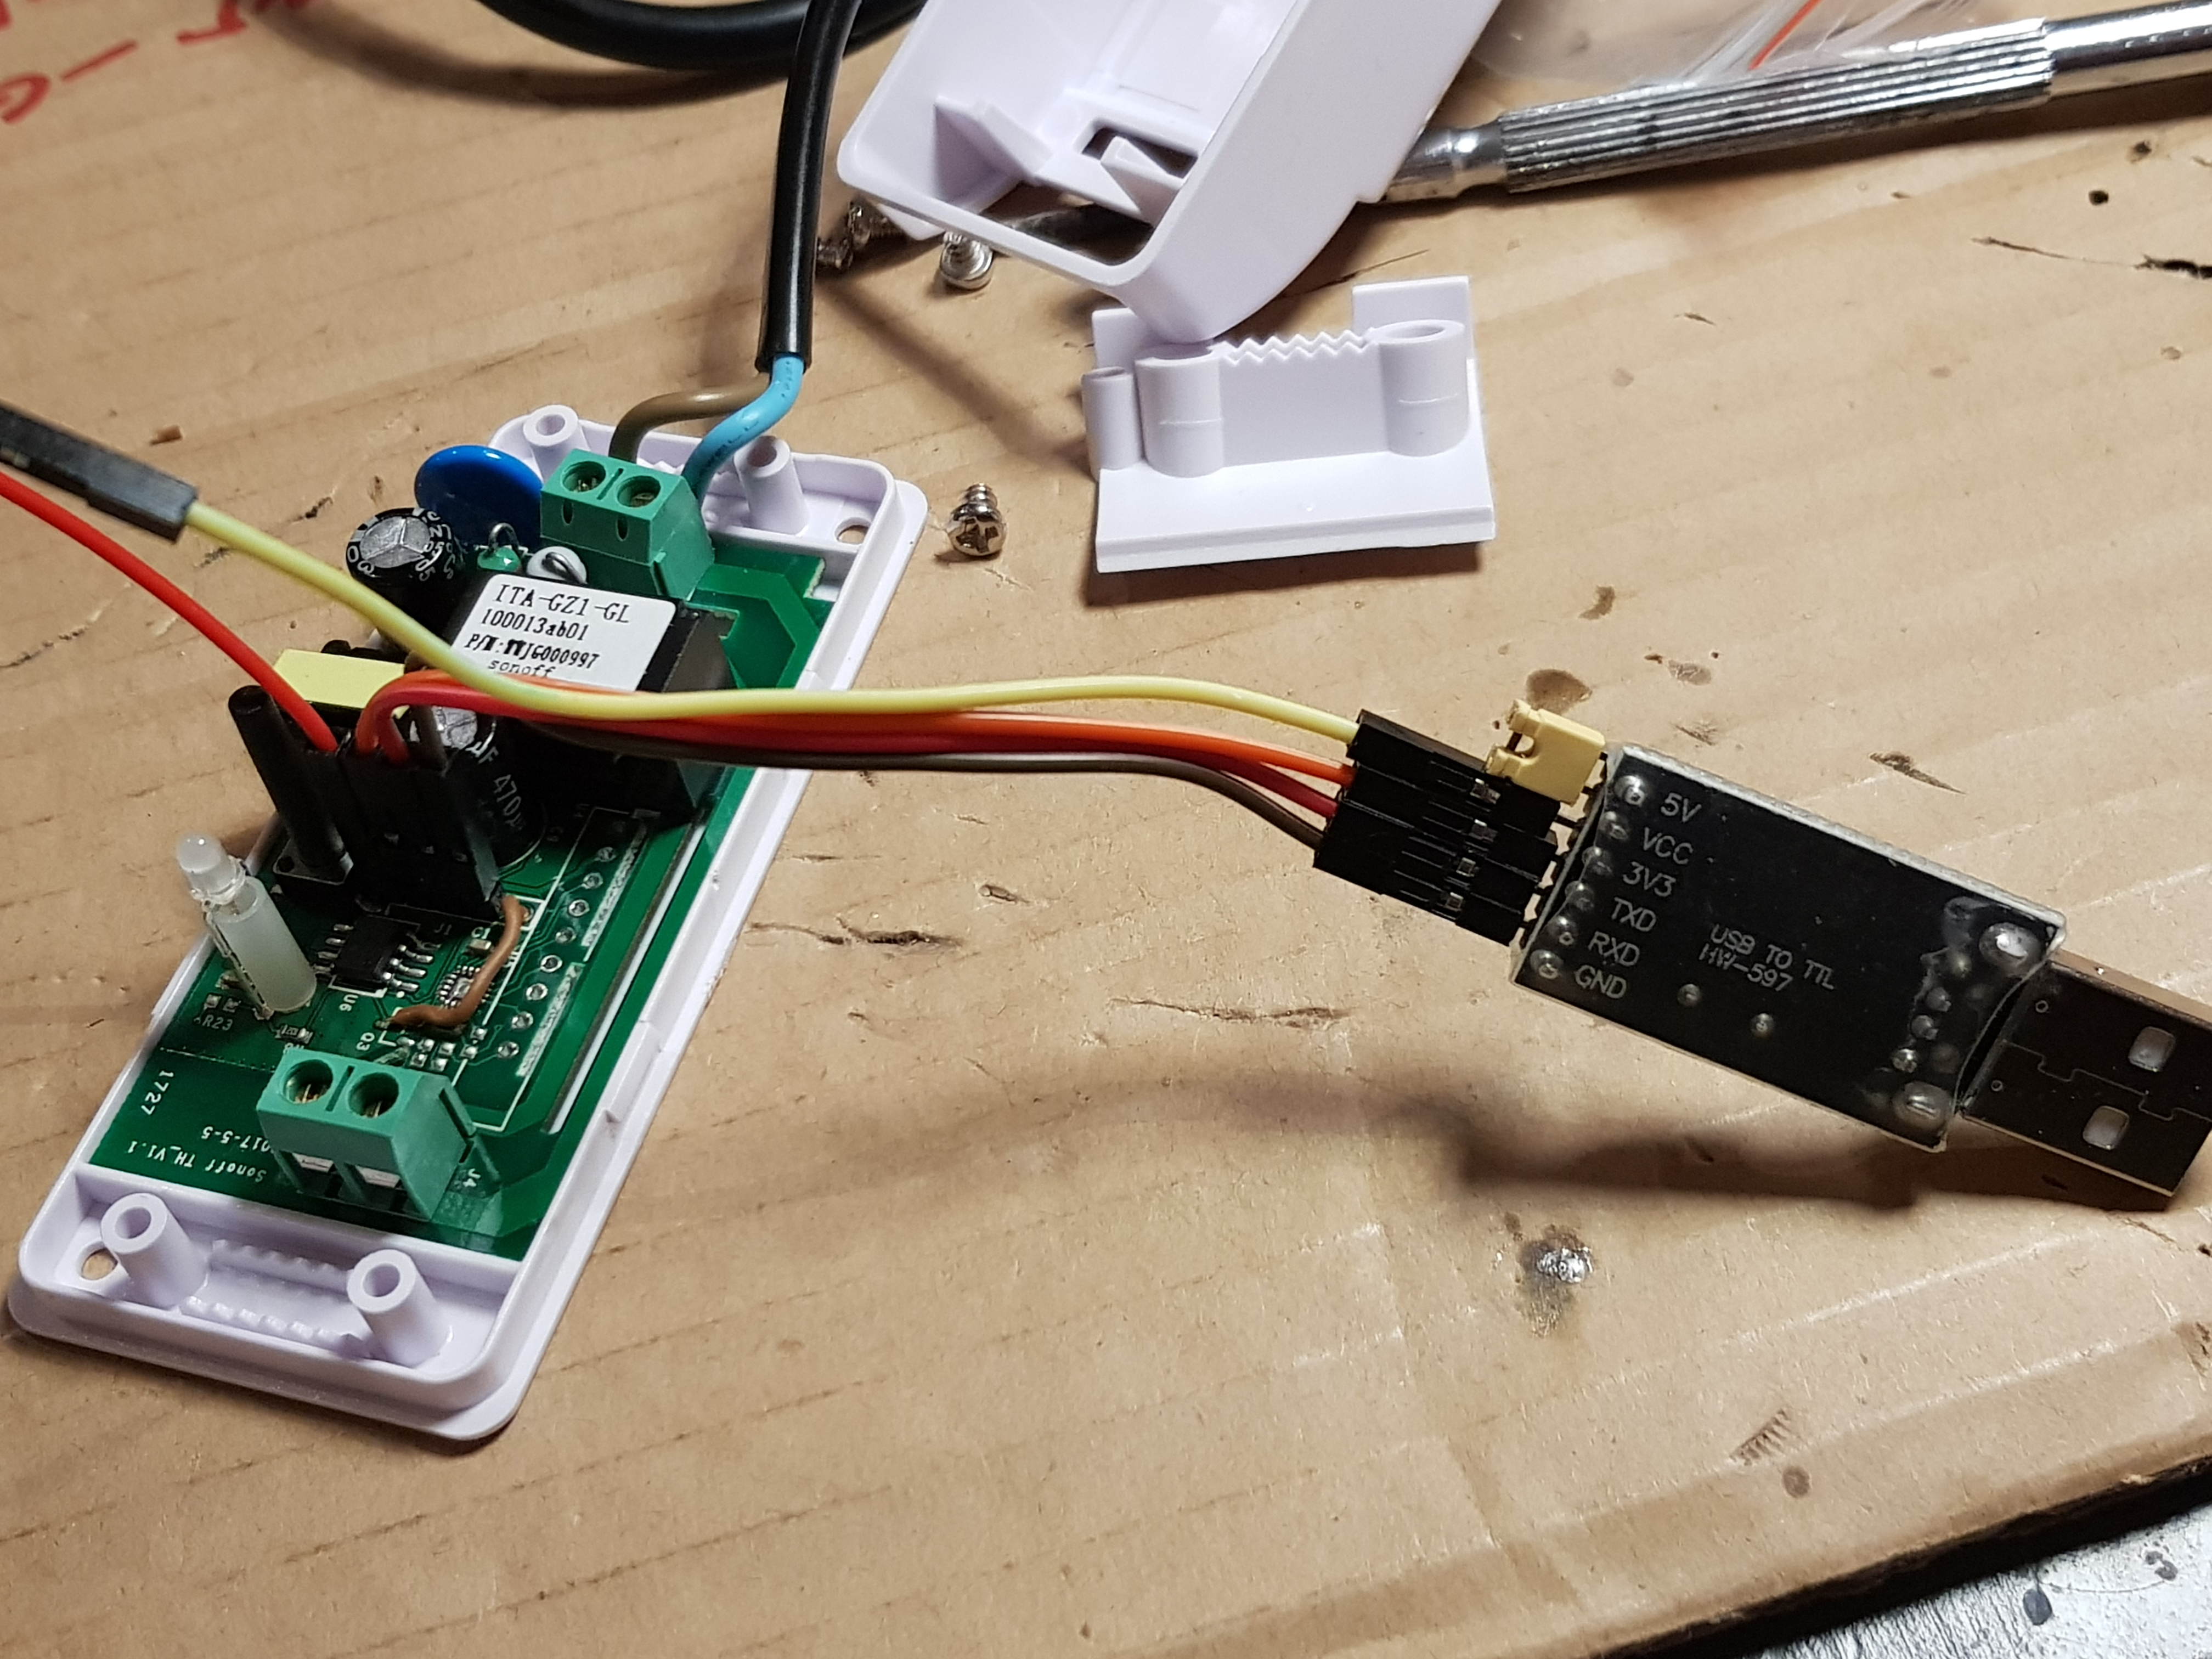
The used connections:
Sonoff Device                 Programmer
--------------------          --------------------
Pin 1  3V3 Power        <->   3V3 Power
Pin 2  RXD              <->   TXD
Pin 3  TXD              <->   RXD
Pin 4  Ground           <->   Ground

Pin 1 counting from closest to the led.
The extra red led wire runs from pin 5 to a solder spot marked with Q3.

WARNING: do NOT connect the mains power when programming!Code language: HTML, XML (xml)
As the TXD and RXD wires need crossing (between sender and receiver), the connection was a nice straight through one, pin by pin. Just as if the header and programmer were designed to be connected to each other 😉
For the power line (3V3) connection, I used two wires. The middle where these did meet, I used as a primitive power switch. To get the Sonoff in firmware update (programing) mode, you need to keep the Sonoff button pressed, and then connect the power
For programming I used the esptool.py program. See: https://github.com/espressif/esptool. I did install the tool on my ubuntu machine using “sudo pip install esptool“. You do need a recent version to get this working. I had a really old one, but that did not support the used ESP/memory combination. The ESP on this Sonoff only has 1 MB of memory. For backup, erase, program, I took the next steps (each time powering off and on the Sonoff while holding the button to get it in the proper flash mode):
# backup (your serial port may be different)
esptool.py --port /dev/ttyUSB0 read_flash 0x00000 0x100000 sonoff-backup.bin

# erase
esptool.py --port /dev/ttyUSB0 erase_flash

# pogram
esptool.py --port /dev/ttyUSB0 write_flash -fs 1MB -fm dout 0x0 sonoff.binCode language: PHP (php)
You don’t need the backup, so you can skip that step. If you go and download the most recent Tasmota firmware, don’t fall for the mistake I made 😉 I thought to choose the sonoff-classic.bin as the safest option (there are many different *.bin versions), but… that one requires more than 1 MB of ESP memory. The normal sonoff.bin file is able to run with the smaller (standard) memory. You can replace the memory chip on the Sonoff with a bigger one yourself, it’s just an 8 pin smd component. I did order a couple of 4 MB ones, but they have not arrived yet. And to be honest, for my current use, the 1 MB is enough. I have not added any additional sensors anyway
After flashing the device (and then removing the programmer, closing the box, and connecting mains power), it becomes an access point (or hit it’s button 4 times to put it in AP mode). You can then connect to it’s WiFi to configure it on address http://192.168.4.1/. That’s a one time setup. After connecting it to your home WiFi network, you can also configure it via the same web page. Just connect to it’s IP address in your web browser. You can find the IP by looking in your router, or by running the FING app on your android phone. Here are some of the screens you see:
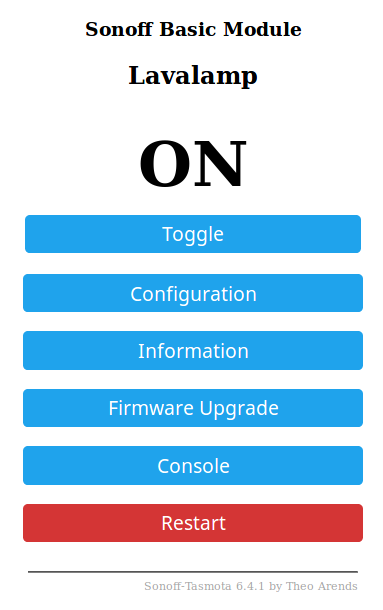
Main Web Page 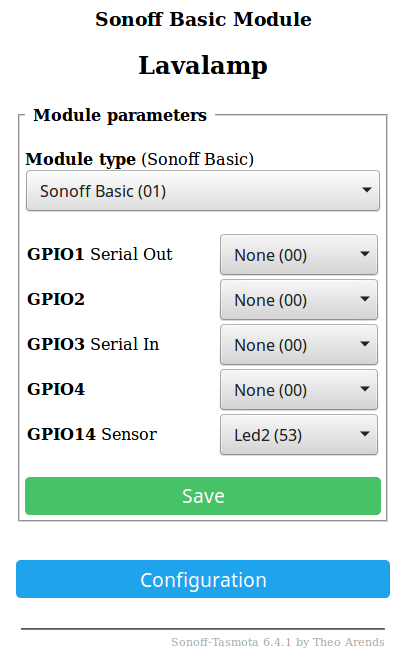
Module Config 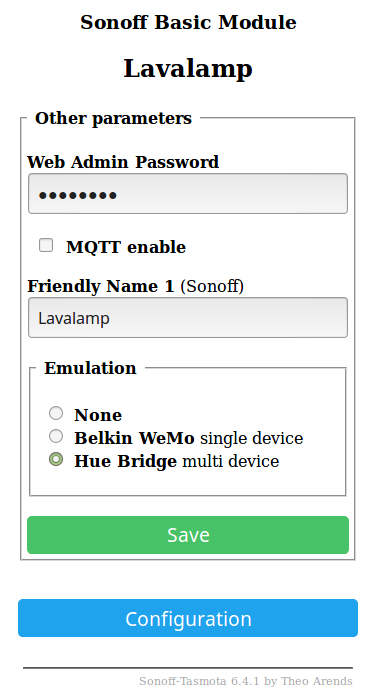
Other Config
There are more config pages, and info pages. I did setup log’s to my NAS using the syslog protocol (to keep an eye on reboots), and there is actually a menu item for programming timed on/off inside the device. But I used my server to send call’s via curl, as I plan to add measuring the on-time from there also. Here’s some example curl statements to talk to the device:
# Turn ON the lamp (your IP address will likely be different):
curl "http://192.168.0.11/cm?user=admin&password=secret123&cmnd=Power+On"

# Turn OFF the lamp:
curl "http://192.168.0.11/cm?user=admin&password=secret123&cmnd=Power+Off"

# Query lamp on/off status:
curl "http://192.168.0.11/cm?user=admin&password=secret123&cmnd=Power"
# This returns a json like this: {"POWER":"ON"}Code language: PHP (php)
To get my Sonoff detected by my Amazon Echo Dot (Alexa), I had to use the “Hue Bridge” simulation. The “Belkin WeMo” simulation did not work, due to a bug in the ESP libraries (not in Tasmota). Probably get’s fixed in due time. Note: I did give my Sonoff a static IP number in the DHCP configuration of my router, just to make sure that my curl commands will always work with the same IP.
Last but not least – a short movie clip of the sonoff in action (sorry, the Sonoff itself is not visible):
Note: I did use an “old” ESP8266 version of the Sonoff. Nowadays, there’s a new version in the wild; it has non-replaceable memory (1 MB is built in, in the new ESP8285), and it does not have the extra pin for connecting to the red led. But… you can still solder on the 4 pin header, and reflash it using Tasmota firmware. No worries – lots of info online to be found.
Thijs.