
Wifi Controlled Alert Light
Intro
Now why would I want to create an alert light? 😉 The use case I had in mind was work related; in our team we do monitor a bunch of kubernetes/docker server clusters, a set of software build tools/services, and an oauth secured open-api-gateway. To keep an eye on this during office hours, we have some big dashboard monitors in the room, showing nice graphs and red/green alert boxes. However, sometimes when you are working on something, it takes a while before you notice the dashboards have started flashing red… oops. So, in comes the alert flash light. When something important needs our attention, the flash light will wake us up!
Note: the flash light is completely self supporting. There is NO need to connect a PC to it using a USB cable. It takes it’s power from the connected net adapter, and it takes it’s command’s over Wifi.
The shopping list
- (second hand) flash light.
- WeMos D1 Mini – ESP8266 Wifi micro controller.
- Bridge rectifier (or 4 diodes, 1N4001) for example KBP307, to make some DC from AC – (my flash light uses a 12V AC adapter).
- Big Electrolytic Capacitor to flatten the AC/DC converted voltage ripple, for example 470 microfarad.
- DC-DC converter module, to transform the high DC (15 volt in my case) to 5 volt DC.
- LED (5 mm).
- Resistor 330 Ohm.
- Small relay with 5 volt coil.
- Small diode, for example 1N4148.
- NPN transistor, for example BC547.
- Resistor 1.6 Kilo Ohm.
- Some hot glue to mount everything in the light housing.
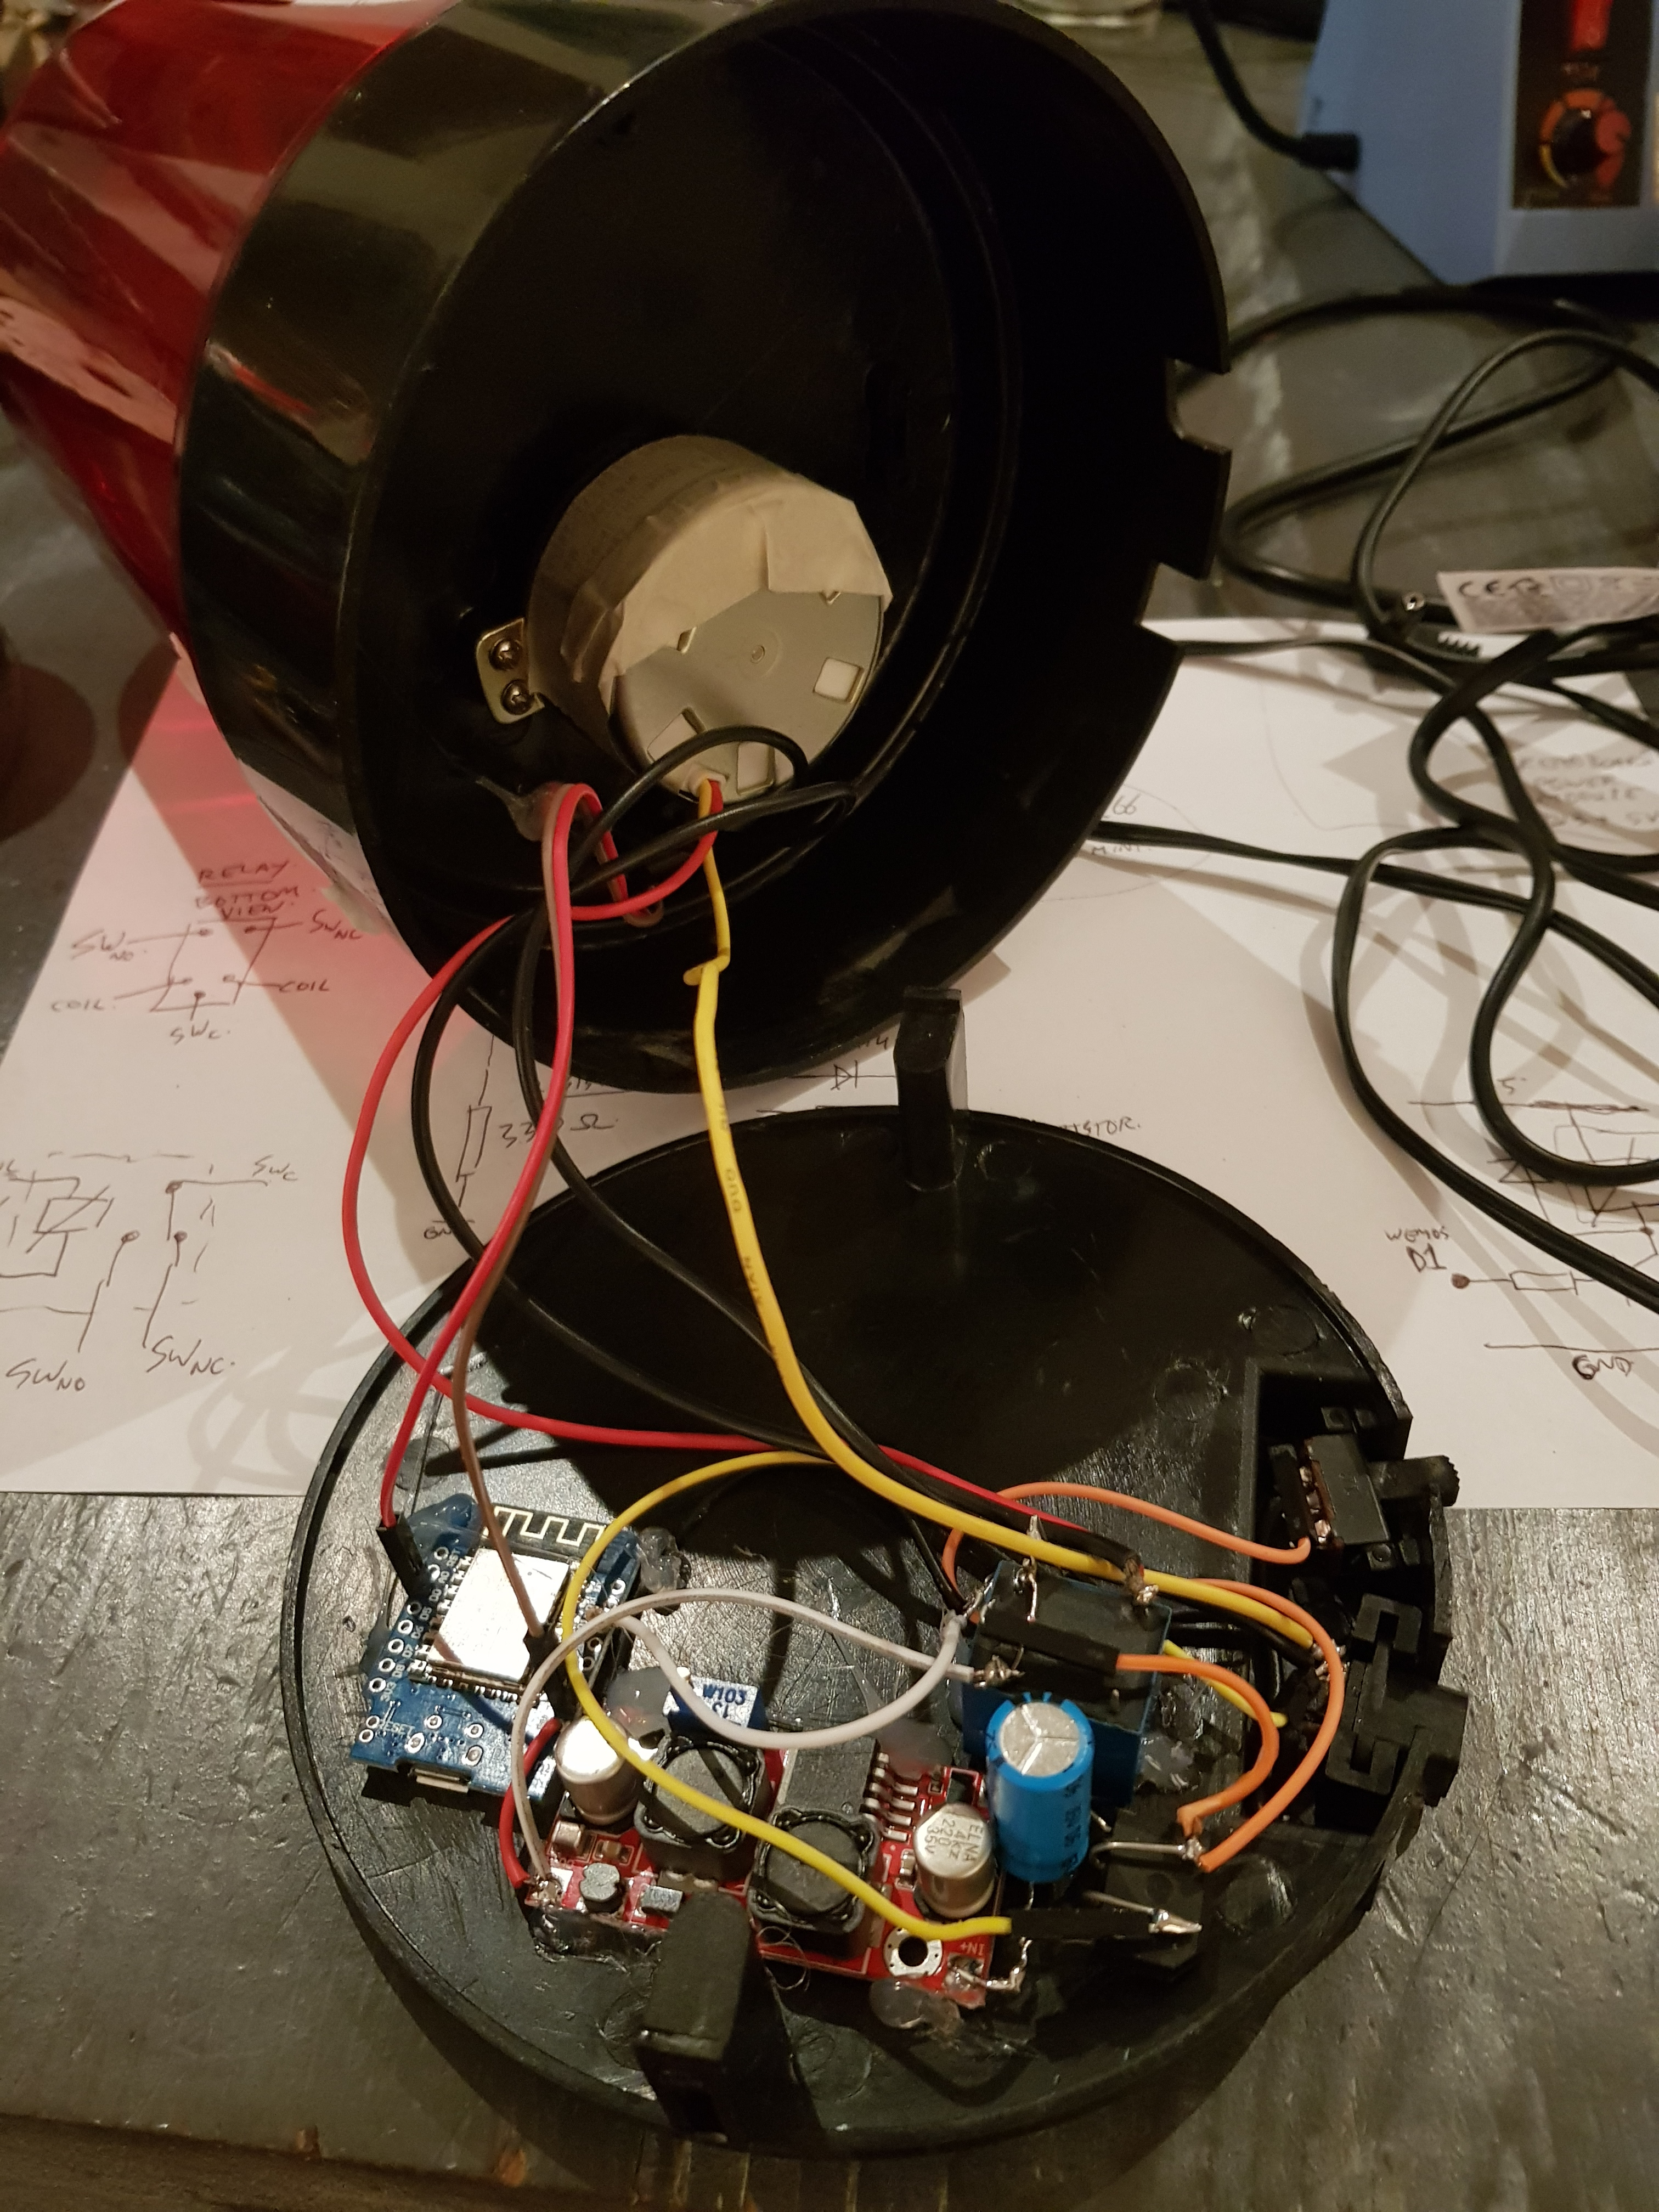
Building the hardware
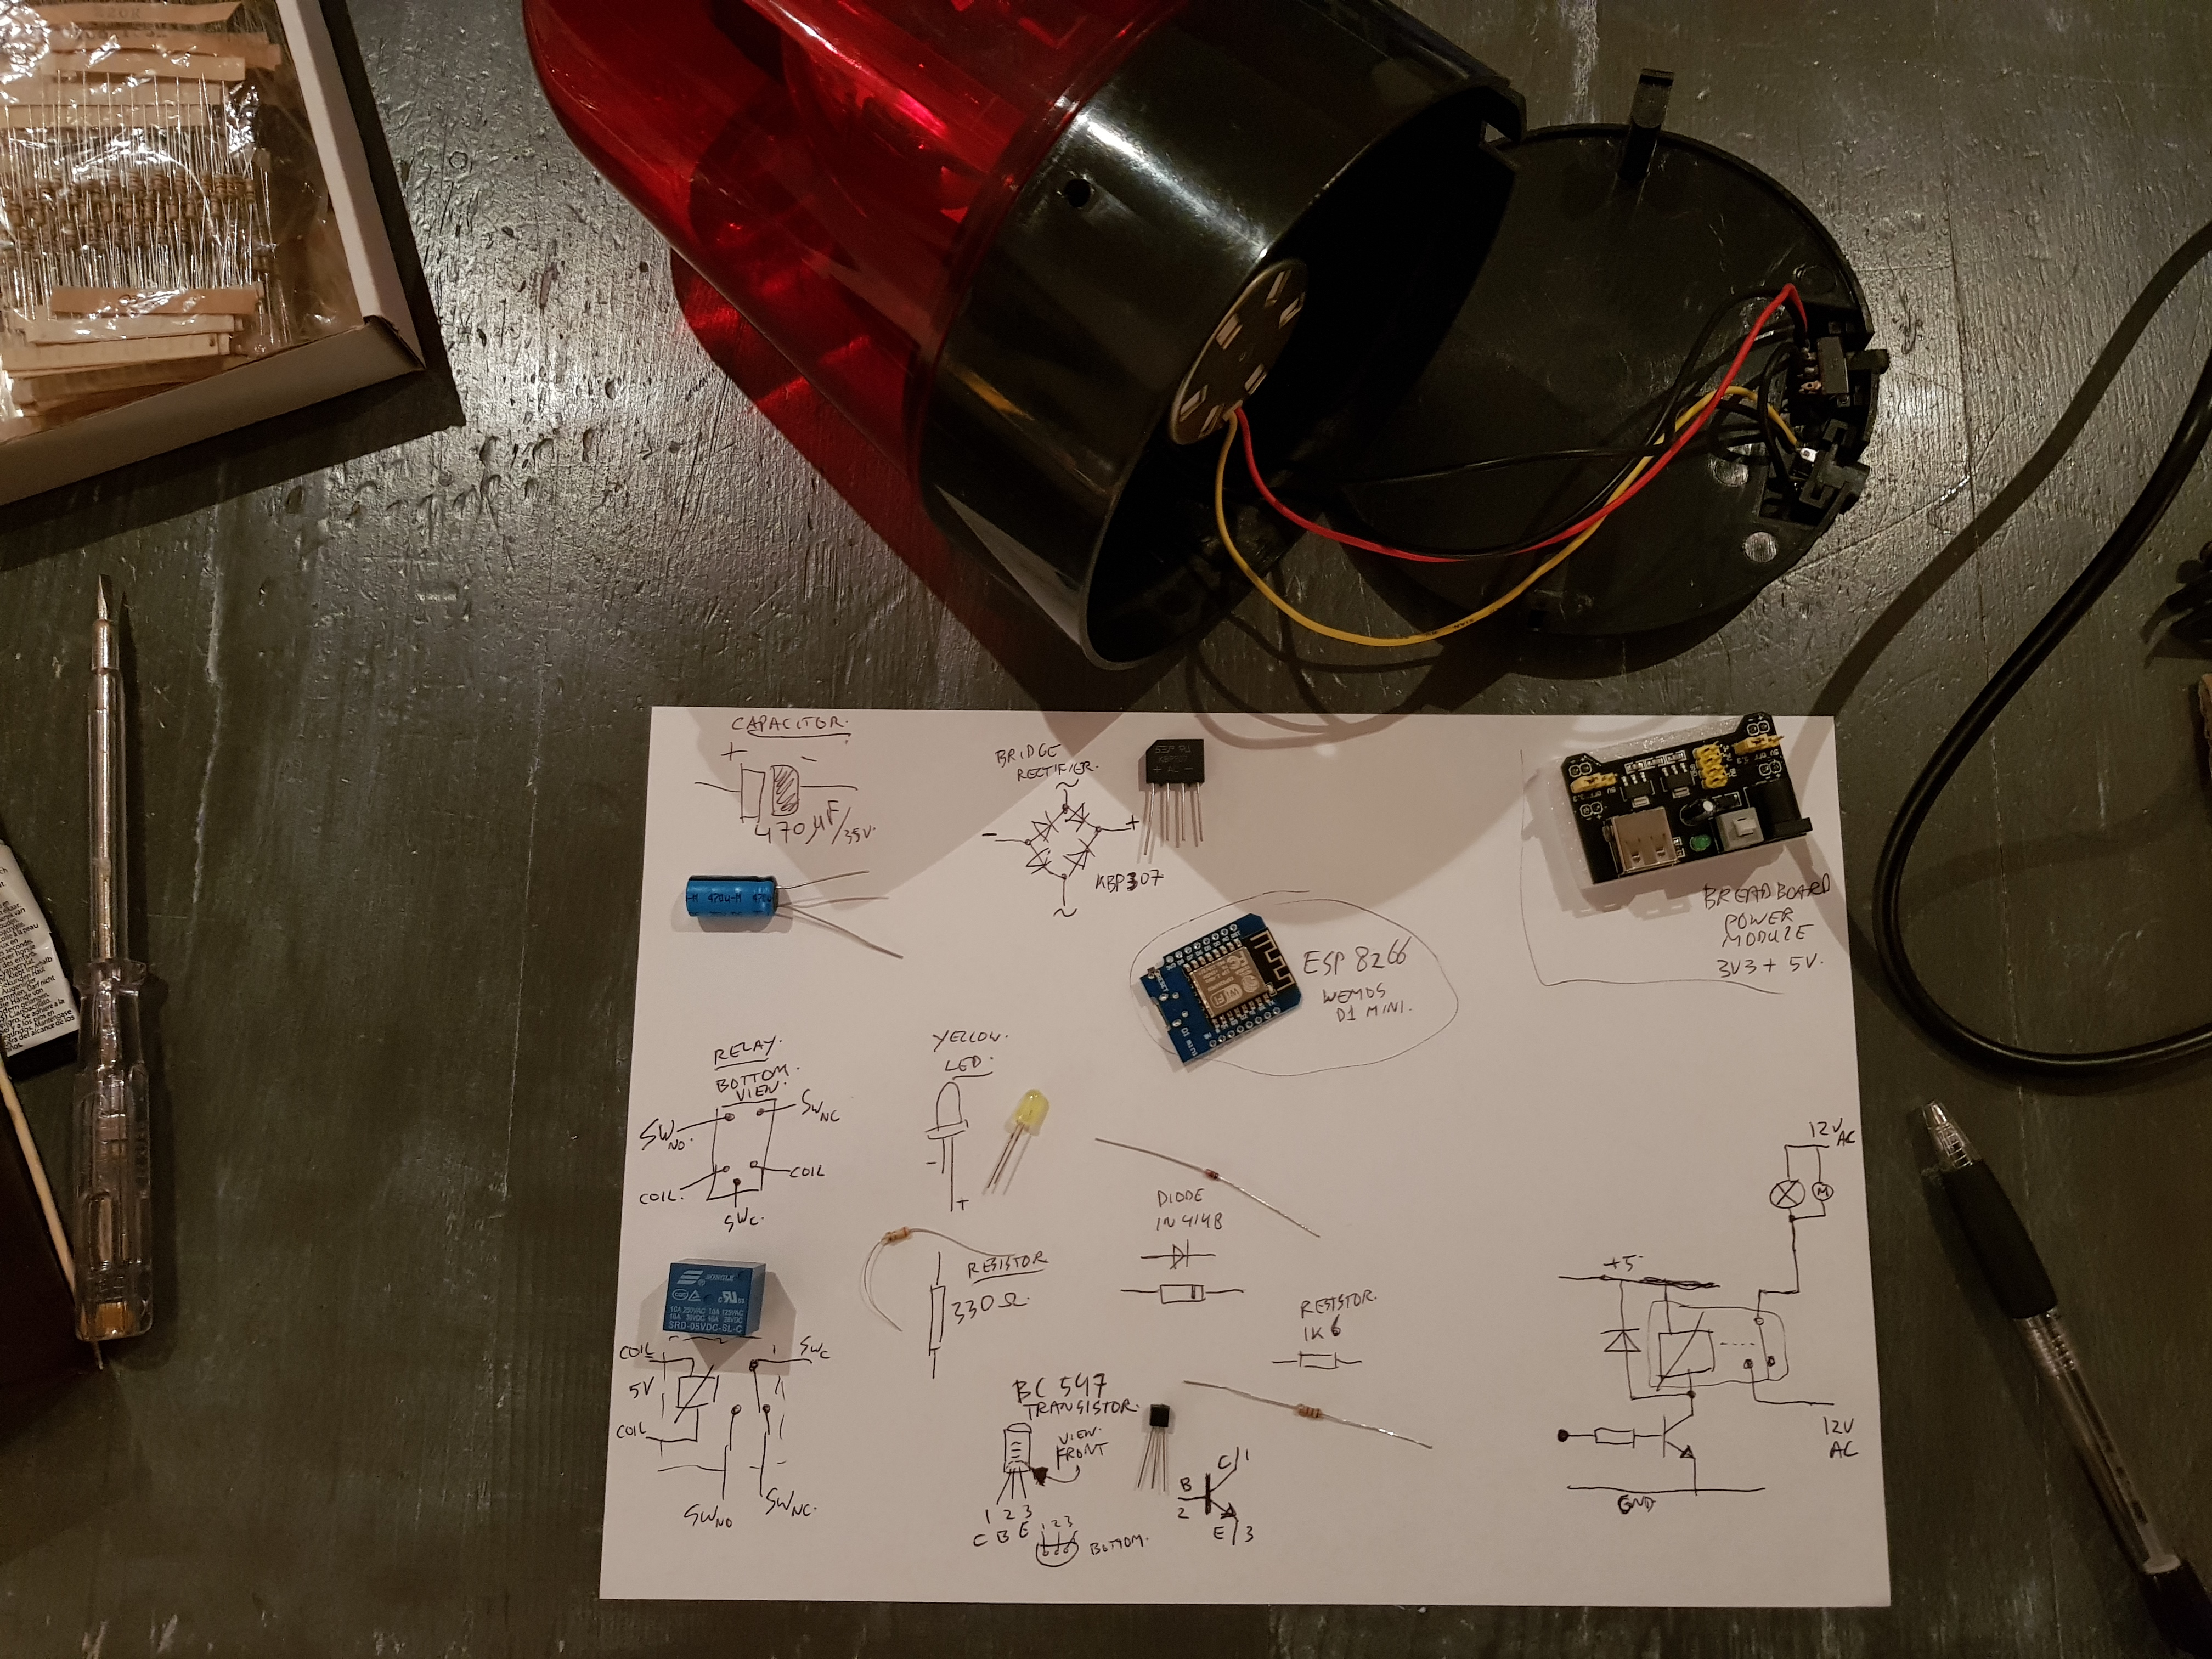
In the top right corner, you see a breadboard power module instead of the mentioned DC-DC converter. The breadboard module was my first attempt. It did work, but… it uses a linear voltage regulator, an smd version of an 7805. What happens in an 7805, is that it needs to “burn” the excess power to get rid of it. So in this case I had a 15 V DC input, and went to 5 V DC output. If I guess that the ESP uses around 300 mA, then the voltage regulator must “burn” 10 Volts at 300 mA, which is P=U*I = 10*0.3 = 3 Watt’s. And that got a bit too much heat in it. So that’s a no-go if there’s no suitable cooling.

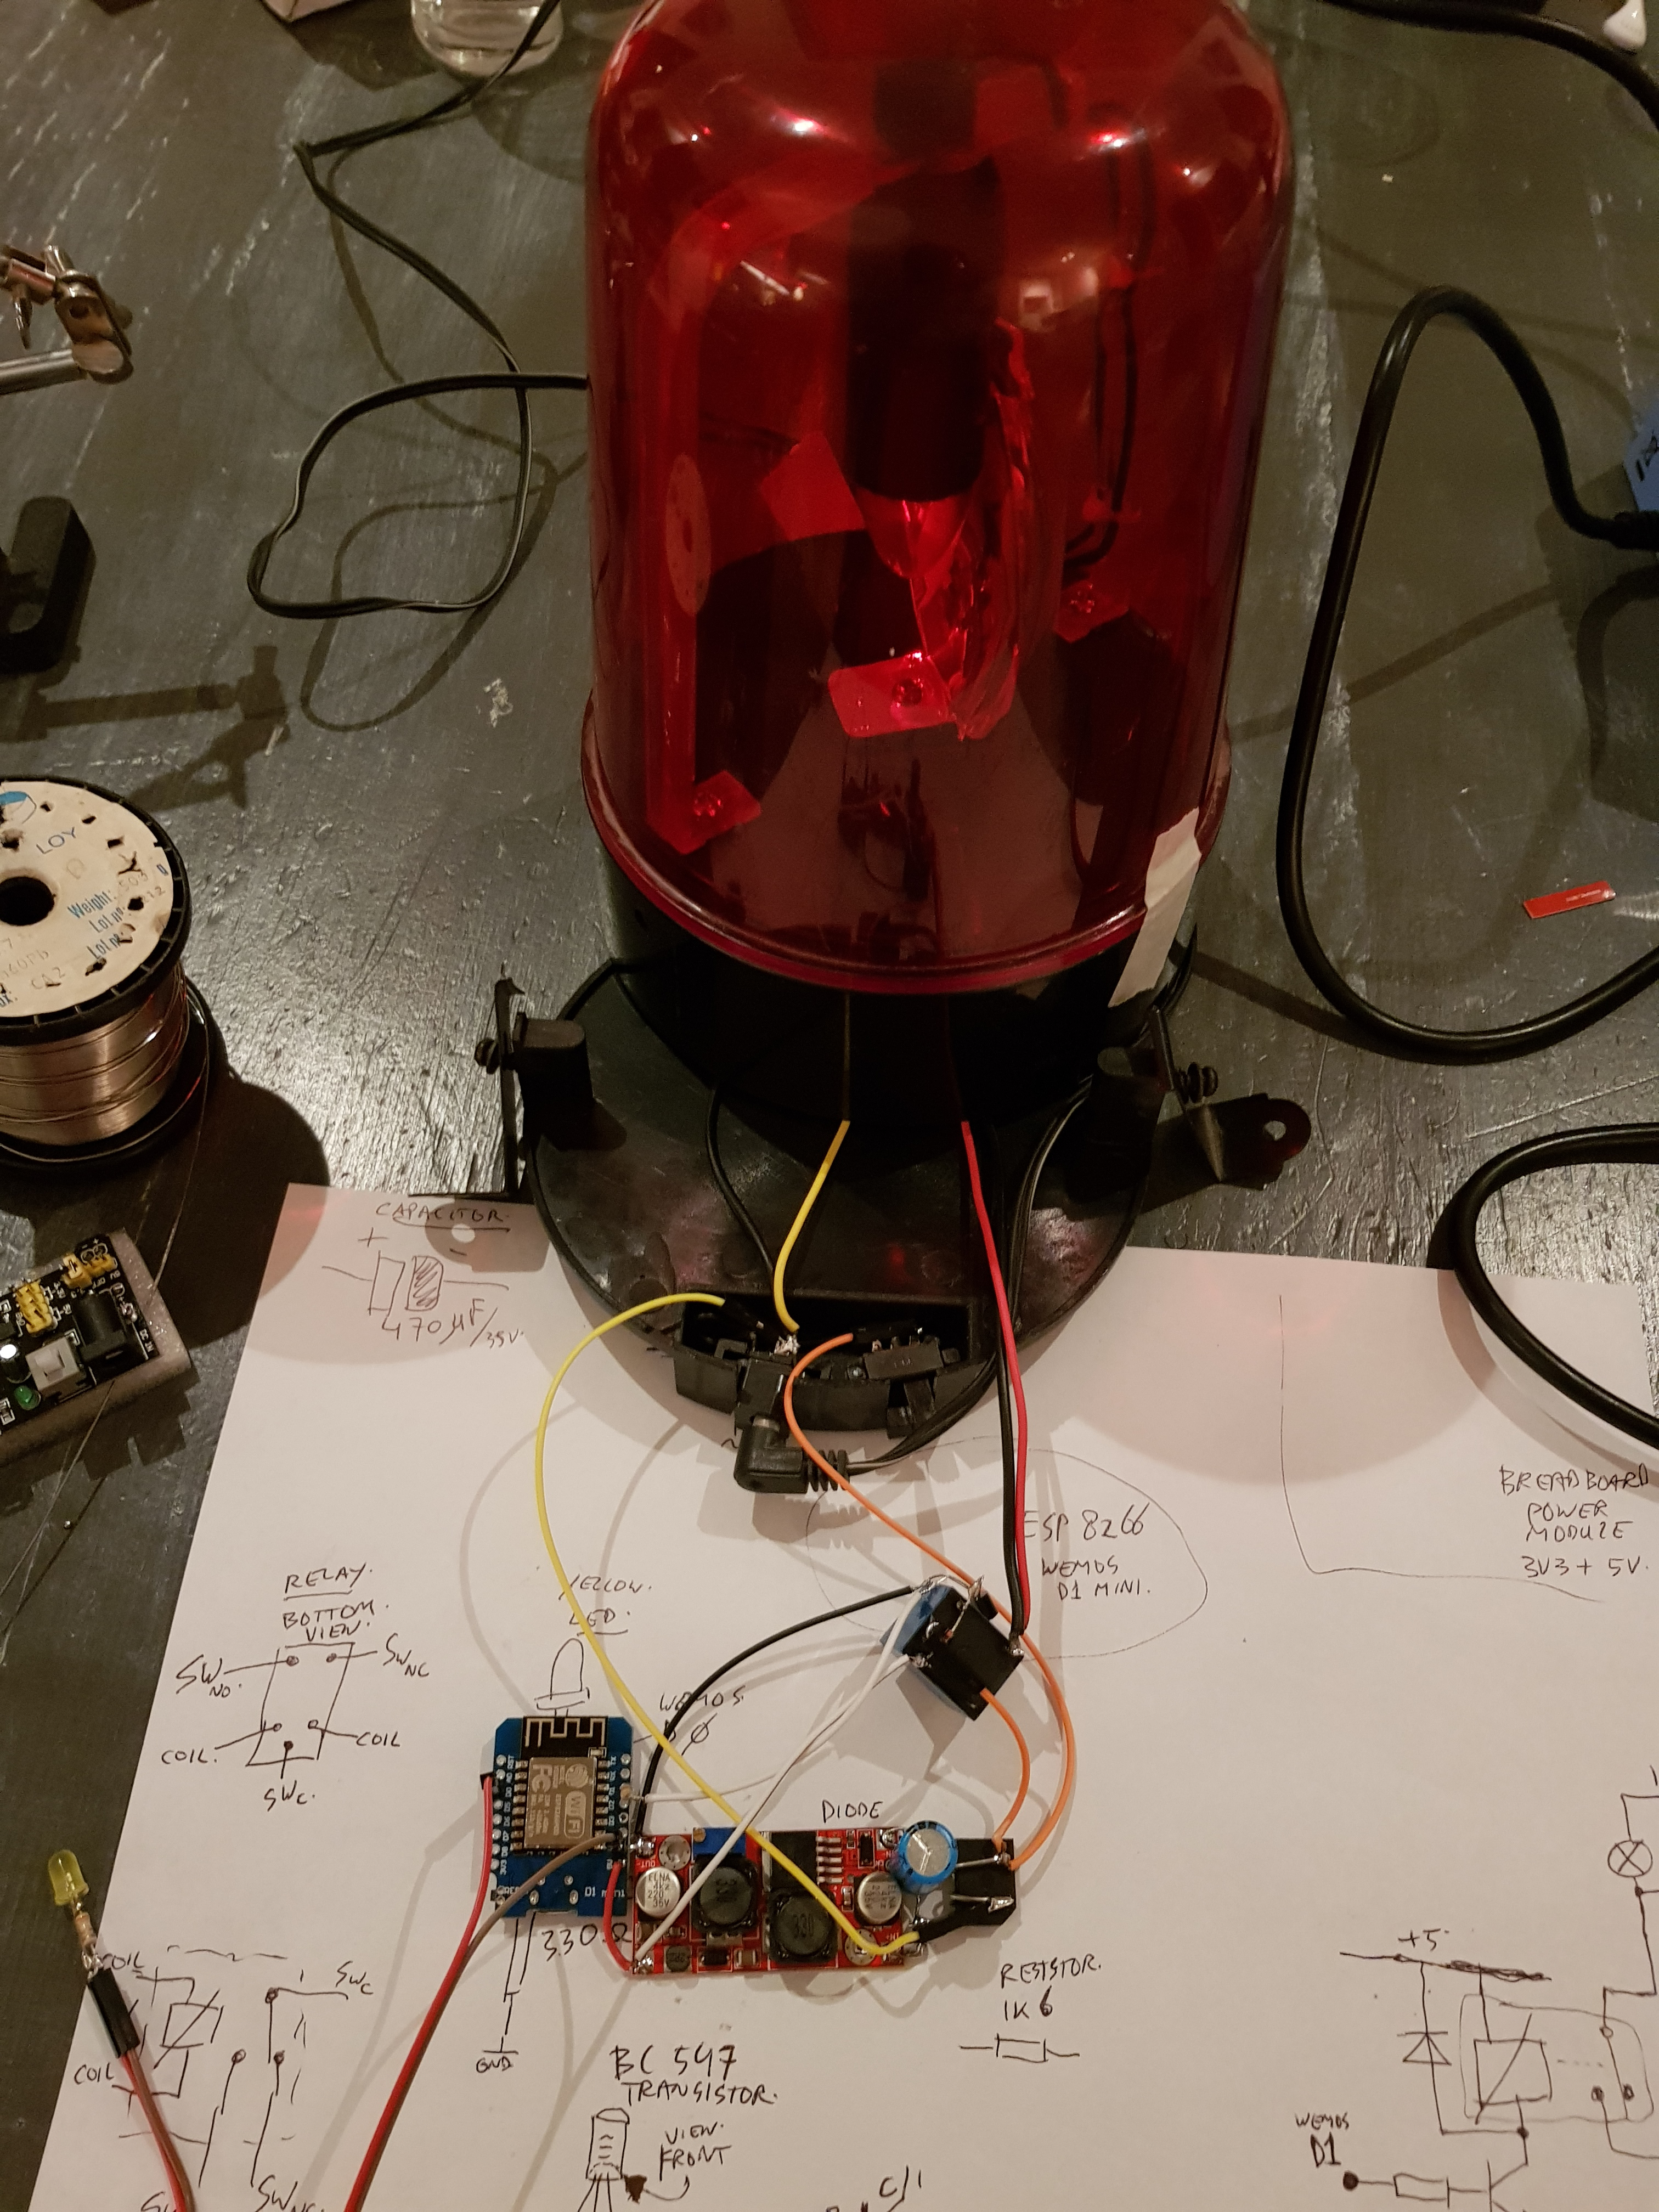
Note: be careful to tune the DC-DC converter to an output voltage of 5 Volts BEFORE soldering it to your WeMos ESP! This converter uses a small potentiometer, but some of these boards also have fixed choices using solder bridges.
The Flash Light Software
The ESP8266 (WeMos D1 Mini) is programmed in a C-like language, using the Arduino IDE. I did use the WifiManager library. It turns the ESP into a Wifi access-point on first start up. You can then connect using a laptop of mobile phone to it, and navigate to 192.168.4.1 to reach a setup menu. It lists the local Wifi networks, and let’s you select one. After that, the ESP restarts, and connects to the Wifi network. It stores the credentials in flash memory, and on a next power-up, it tries to use them again.
The source shown here, can be used as a starting point in case you want to replicate the project. It has no security measures, so it might need some additional stuff if required.
The office location where I’m running the device, has strict network access policies. This device is NOT allowed on the internal intranet network, but run’s on a guest network which only has outgoing internet access. The platform notifications come from the internal network (or actually, from the datacenter secure zone network), which has no access to the guest network… nice eh… So I did create a bridge server on the internet. It does listen for requests from the ESP flash light, and from the platform alert manager software. The ESP is executing a so called long-poll http request. It tries to read a special url, but that url “hangs” in the response stream. It will either give up after 60 seconds, or it will send a light on/off/pulse command as response. The long-poll server has two sides to it, it keeps the light waiting, but on the other side, it just waits for a command from the alert manager server. When that command comes in, it immediately passes it on to the long-poll response. This gives a nice and quick reaction in the flash light. It does not have to hammer the server with lots of fast polling requests, just one per minute, but it immediately within a second, responds to a command. Nice!
The ESP source code (file WifiControlledAlertLight.ino in folder Arduino/WifiControlledAlertLight): https://github.com/atkaper/WifiControlledAlertLight/blob/master/WifiControlledAlertLight.ino
The Server Software
For completeness, here’s the server source for long-poll.php. Can run in apache with PHP: https://github.com/atkaper/WifiControlledAlertLight/blob/master/long-poll.php
Testing the light
Some (shell – curl) test commands, to use the flash light:
# Note: you can find the user (mac address) to use, by looking for the data_*.poll files in your folder,
# or, look in your server access log to find the user-agent which contains the mac address.

# enable light for 4 seconds:
curl -v "http://YOUR-SERVER.SOMEWERE/SOMEPATH/long-poll.php?user=12_34_56_78_90_AB&code=4000"

# flash the LED due to unknown command code:
curl -v "http://YOUR-SERVER.SOMEWERE/SOMEPATH/long-poll.php?user=12_34_56_78_90_AB&code=flash-led"

# ask the server for online-status of the flash light:
curl -s "http://YOUR-SERVER.SOMEWERE/SOMEPATH/long-poll.php?user=12_34_56_78_90_AB&status"

# response will be like this:
ONLINE November 13 2018 22:41:26.


# If your flash light is on your local wireless network, and you CAN reach it, and know it's IP, you can also
# enable the light with a call like this (replace IP with correct IP):
curl -v "http://192.168.0.123/light/pulse"

# See the ESP source code above for other command's you can send to it ;-)Code language: PHP (php)
The End
In case someone is curious; in our platform we use prometheus alert manager and grafana to contact the flash light in case of problems (well… at least that’s the plan… this a one of the loose ends of the project).
That’s it for now… putting this project in this article almost took more time than building it 😉
Thijs.